

This chocolate tart crust (chocolate shortcrust pastry) is a variation of the traditional pâte sucrée that features cocoa powder in the dough for a delightful chocolate twist. Rich and buttery, this crust can be used as a base for tarts or to make cookies. You can also spoon chocolate ganache on a cookie then top it with another to make delicious sandwich cookies.

Why You’ll Love This Recipe
- No mixer: You don’t need a mixer to make this dough. In fact, the dough will be better and more foolproof if you don’t use a mixer. Win win!
- Make-ahead: The dough can be chilled for 3 days or frozen for a month. Prepare it whenever you have some free time and save it until needed.
- Versatile: You can pair this chocolate tart crust with whatever filling you like. I used it to make chocolate ganache tart and chocolate caramel tart for example. And if you have kids circling you while you are trying to line your tart pan, give them some dough and cookie cutters and you’ll get awesome cookies!

Ingredients
- Flour: All-purpose flour will give us just the right amount of structure and elasticity. If you use flour with a low-protein content (such as cake flour), the dough might be too delicate to handle. On the other hand, dough made with high-protein flour (bread flour) will be too elastic and likelier to shrink in the oven.
- Butter: Unsalted butter for richness, flavor and tenderness. I use European style butter (82% fat). Make sure the butter is very soft before starting. I’ll usually cut it up into small pieces so it warms up quickly and leave it on the kitchen counter for 1-2 hours. You could use a microwave to soften the butter faster but be careful not to melt it. Heat it in very short increments and stir every time so it warms up evenly.
- Sugar: I like to use powdered (icing) sugar as it is easier to mix into the dough. Less mixing also means less gluten is formed and less air is incorporated into the dough. You’ll be less likely to have random air pockets in the crust during baking. Powdered sugar also contains a little bit of cornstarch which makes the crust more tender. This dough isn’t very sweet which makes it perfect with sweet fillings.

- Egg: You’ll need one large room temperature egg (50 g/1.8 oz.) for flavor, structure and to hydrate the dough.
- Almond flour: We’ll be adding a little bit of almond flour for texture and a mild nutty flavor. You can use hazelnuts instead. I prefer to make almond flour myself by grinding whole almonds as I find it more flavorful and cheaper than store-bought flour. Since the quantity needed for this recipe is quite small, it’s best to make a larger batch. Simply chill leftover flour in an airtight container for another use.
Homemade almond flour: Place blanched almonds in a small food processor bowl and process until ground, scraping the bottom edges of the bowl occasionally. Be careful not to mix for too long so you don’t end up with almond butter.


- Cocoa powder: You’ll need unsweetened cocoa powder to flavor and color the dough. I use Dutch-process cocoa powder.
- Flavorings: A little bit of vanilla extract and a pinch of salt, to enhance all the flavors. If you are a fan of the chocolate-orange combo, I really recommend adding a little bit of orange zest. You’ll get a fantastic smell in your kitchen and an incredible flavor which will develop even more with time. You can use other fruits if you prefer, such as lemon or lime.
Creaming Method for Tarts
To mix the ingredients, we’ll be using the creaming method where we start by combining the butter and sugar. However, if you are used to making cookies, you might be tempted to mix for a few minutes until light and fluffy. This is not our goal today. We want to start with very soft butter (but not melted) and mix as little as possible to avoid adding air to the dough. Too much air would cause the dough to puff up during baking.
We’ll then add the almond flour, egg and flavorings to the creamed butter. This mixture is then carefully combined with the flour and cocoa powder just until a homogeneous dough forms. Overmixing the dough would cause too much gluten to form, leading to an elastic, tough crust that shrinks in the oven.

Step-by-Step Instructions
Creaming the butter
- Place the butter in a large bowl and press it with a spatula to make sure it has the right consistency. It should be very soft so that you can easily incorporate the other ingredients.


- Add the powdered sugar and mix with the spatula until fully combined.


- Mix in the almond flour then add the orange zest (if using).
- Briefly mix together the egg and vanilla extract in a small cup then pour over the mixture.
Make sure the egg is at room temperature to prevent curdling. If this happens, you’ll have to whisk a little longer to combine all the ingredients. And preferably use weights when baking as you might have introduced too many air bubbles.

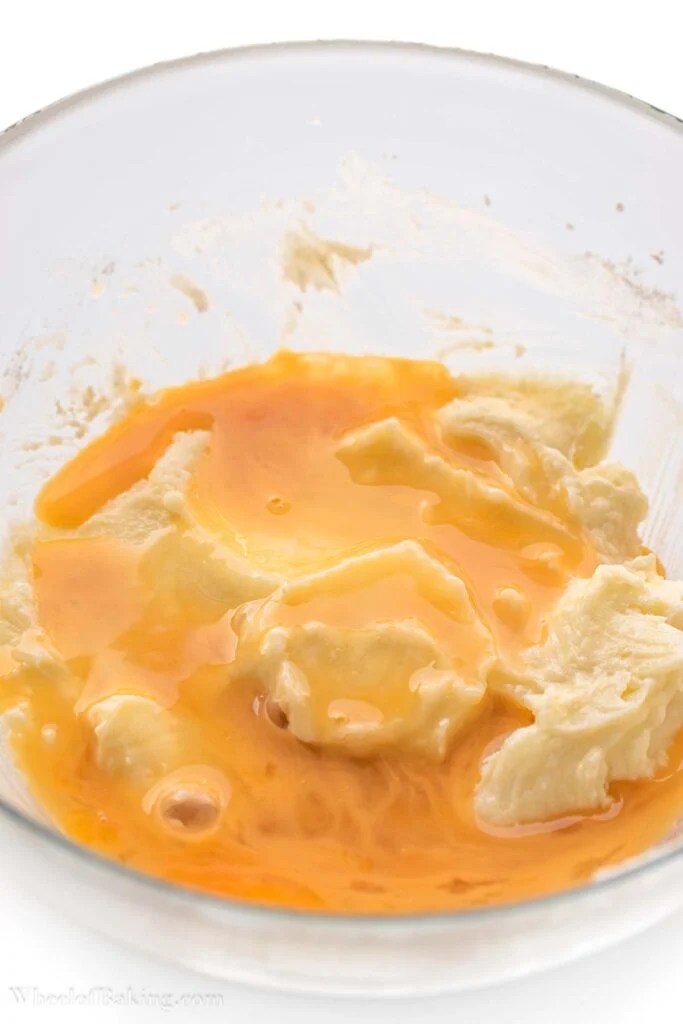
- Mix just until fully combined and smooth. Use a whisk if needed to incorporate the egg.


Adding the dry ingredients
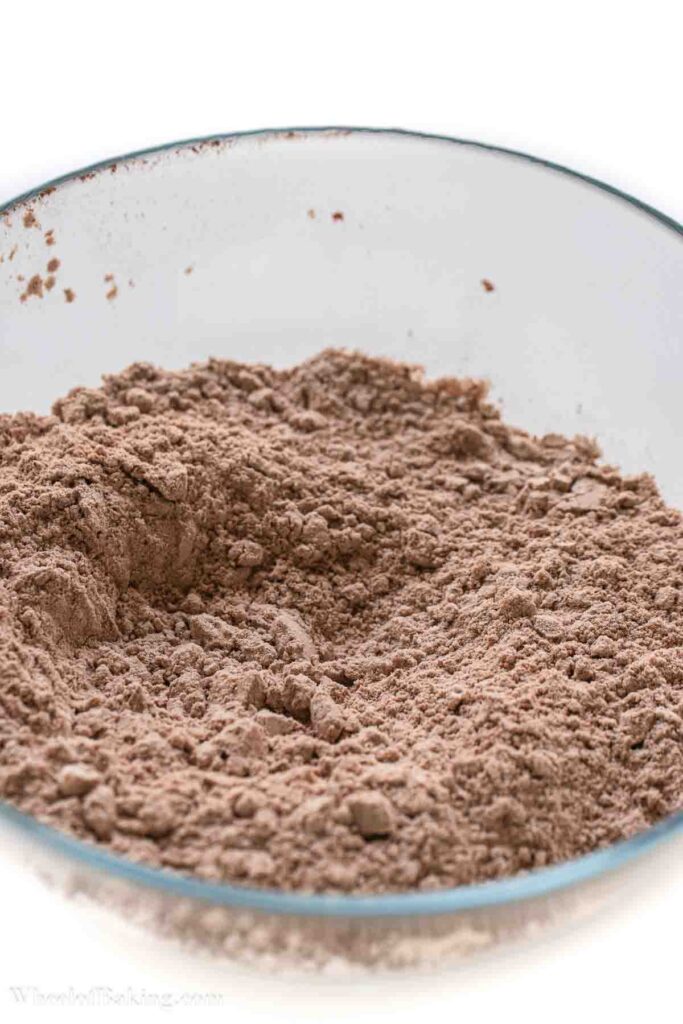
- Sift together the flour and cocoa powder into another bowl then whisk in the salt.

- Transfer the dry ingredients onto a clean work surface (or on a piece of parchment paper) and create a well in the middle. Pour the butter mixture in the middle of the well. You can keep everything in the bowl if you prefer. You’ll just have a bit less space to work with.
- Using a dough scraper (or a spatula), “cut” through the dough in small, repetitive, vertical movements. Gather the dough every now and then and keep cutting through it just until it looks homogeneous and can be gathered into a ball. The dough will seem very dry at first and impossible to combine but you’ll eventually manage to form a nice smooth ball. Tip: Don’t mix the dough more than needed or it will be more likely to shrink in the oven.


- Fraisage (optional): Using the heel of your hand, push the dough down away from you. Do this about 2 times (not more than 3) to get rid of any remaining butter pieces.
- Place the dough on a piece of parchment paper and flatten into a rectangle with your hands. Wrap tightly and chill until firm enough to handle, at least 1 hour (ideally overnight).
Tip: If you have space in your fridge and are in a rush, roll out the dough between two sheets of parchment paper before chilling it. Place it on a baking sheet (with the parchment paper) and chill until firm but malleable.


Lining The Tart Pan
I’ve written a detailed article on how to line a tart pan with pastry. You can check it out if you’re not sure how to do this.
- Remove the dough from the fridge and cut out the desired amount. If making a 23 cm (9 inch) tart for example, you will need about 300 g of dough. For other sizes, read How much dough is needed for a specific pan size. Tip: Freeze leftover dough in a zip-lock bag labelled with the date and type of dough.
This recipe yields a lot of dough and it’s better to work only with what you need. Why? 1) It will be easier to roll out the dough if there is less. 2) You shouldn’t overwork the dough by rolling it out several times. This would cause too much gluten formation leading to a tough and elastic dough that shrinks in the oven.
- Place the dough between two sheets of parchment paper and roll it out to a thickness of about 3 mm (1/8 inch). Tip: If the dough is hard to work with or starts cracking, it’s probably too cold (likely to happen if you left it in the fridge overnight). Let it warm up at room temperature for about 10-15 minutes and try again. If it’s too soft, chill it (or freeze it briefly) before proceeding.
- Line the tart (or tartlet) pan with dough, making sure it touches all the edges of the pan by gently pressing with your fingers. Use a rolling pin (or a knife) to cut off the excess dough.
- Prick the tart(s) with a fork then freeze for 15 minutes while preheating the oven to 180°C (356°F), conventional setting. If using a tart pan with a removable bottom, place it on a baking sheet first. This will make it easier to move the tart pan without ripping the dough.


- Bake in the bottom third of the oven until just firm to the touch, about 30-35 minutes for a 9 inch tart (20-25 minutes for tartlets).
- Let the tart crust cool completely (in the pan) on a wire rack. Fill as desired.
Baking with weights: If you notice the crust puffing up during baking, remove it from the oven, push down the bubbles with the back of a metal spoon before the tart sets and return to the oven. You could alternatively use weights such as chick peas. To do so, place a piece of parchment paper on the tart and fill it with weights before baking. For a large tart, bake with weights for 15 minutes and keep baking for about 15 more minutes once you remove the weights. To bake tartlets, bake with weights for 15 minutes. Remove the weights and bake for about 10 more minutes.
This post was originally published on January 7, 2021. I updated it with new pictures and more information.
Love Making Tarts? You Might Like:
- Chocolate ganache tart
- Chocolate caramel tart
- How to make a French tart
- How to line a tart pan
- More tart recipes…
LOVE THIS RECIPE? I’d be so grateful if you could leave a ⭐⭐⭐⭐⭐ rating in the recipe card below!

Chocolate Tart Crust (Chocolate Shortcrust Pastry)
This chocolate tart crust (chocolate shortcrust pastry) is a variation of the traditional pâte sucrée that features cocoa powder in the dough for a delightful chocolate twist. Rich and buttery, this crust can be used as a base for tarts or to make cookies.
)
16
servings20
minutes30
minutes1
hour15
minutesIngredients
150 g unsalted butter, cut into pieces and softened at room temperature (5.3 oz.)
90 g powdered (icing) sugar (3.2 oz.)
25 g almond flour (0.9 oz.)
zest of 1 orange (optional)
1 large egg (50 g/1.8 oz.), at room temperature
1 teaspoon vanilla extract
250 g all-purpose flour (8.8 oz.)
20 g unsweetened Dutch-process cocoa powder (0.7 oz.)
Pinch of salt (or fleur de sel)
Directions
- Place the butter in a large bowl and press it with a spatula to make sure it has the right consistency. It should be very soft so that you can easily incorporate the other ingredients.
- Add the powdered sugar and mix with the spatula until fully combined.
- Mix in the almond flour then add the orange zest (if using).
- Briefly mix together the egg and vanilla extract in a small cup then pour over the mixture.
- Mix just until fully combined and smooth. Use a whisk if needed to incorporate the egg.
- Sift together the flour and cocoa powder into another bowl then whisk in the salt.
- Transfer the dry ingredients onto a clean work surface (or on a piece of parchment paper) and create a well in the middle. Pour the butter mixture in the middle of the well. You can keep everything in the bowl if you prefer. You’ll just have a bit less space to work with.
- Using a dough scraper (or a spatula), “cut” through the dough in small, repetitive, vertical movements. Gather the dough every now and then and keep cutting through it just until it looks homogeneous and can be gathered into a ball. The dough will seem very dry at first and impossible to combine but you’ll eventually manage to form a nice smooth ball. Tip: Don’t mix the dough more than needed or it will be more likely to shrink in the oven.
- Fraisage (optional): Using the heel of your hand, push the dough down away from you. Do this about 2 times (not more than 3) to get rid of any remaining butter pieces.
- Place the dough on a piece of parchment paper and flatten into a rectangle with your hands. Wrap tightly and chill until firm enough to handle, at least 1 hour (ideally overnight).
- Remove the dough from the fridge and cut out the desired amount. If making a 23 cm (9 inch) tart for example, you will need about 300 g (10.6 oz.) of dough. Tip: Freeze leftover dough in a zip-lock bag labelled with the date and type of dough.
- Place the dough between two sheets of parchment paper and roll it out to a thickness of about 3 mm (1/8 inch). Tip: If the dough is hard to work with or starts cracking, it’s probably too cold (likely to happen if you left it in the fridge overnight). Let it warm up at room temperature for about 10-15 minutes and try again. If it’s too soft, chill it (or freeze it briefly) before proceeding.
- Line the tart (or tartlet) pan with dough, making sure it touches all the edges of the pan by gently pressing with your fingers. Use a rolling pin (or a knife) to cut off the excess dough.
- Prick the tart(s) with a fork then freeze for 15 minutes while preheating the oven to 180°C (356°F), conventional setting. If using a tart pan with a removable bottom, place it on a baking sheet first. This will make it easier to move the tart pan without ripping the dough.
- Bake in the bottom third of the oven until just firm to the touch, about 30-35 minutes for a 9 inch tart (20-25 minutes for tartlets). Tip: If you notice the crust puffing up during baking, remove it from the oven, push down the bubbles with the back of a metal spoon before the tart sets and return to the oven. You could alternatively use weights such as chick peas (see notes below).
- Let the tart crust cool completely (in the pan) on a wire rack. Fill as desired.
Notes
- Yield: This recipe is enough to make about 580 g (20.5 oz.) of dough.
- Make-ahead tips: The unbaked dough will keep in the fridge for up to 3 days and can easily be frozen in a zip-lock bag for up to 1 month. Baked (unfilled) crust or cookies can be stored in an airtight container at room temperature for a few days. They will get soggy if stored in the refrigerator.
- Baking with weights: The dough shouldn’t rise during baking if you froze it (or refrigerated it) after lining the pan. If you are worried however, you can place a piece of parchment paper on the tart and fill it with weights before baking. To bake tartlets, bake with weights for 15 minutes. Remove the weights and bake for about 10 more minutes. For a large tart, bake with weights for 15 minutes and keep baking for about 15 more minutes once you remove the weights. You might need to adjust the baking time depending on your oven. The crust is ready when it is just firm to the touch.
- This dough can be prepared using a stand-mixer fitted with the paddle attachment. It is recommended to make it by hand to avoid overworking the dough which might cause it to shrink during baking.
- Make sure the egg is at room temperature to prevent curdling. If this happens, you’ll have to whisk a little longer to combine all the ingredients. And preferably use weights when baking as you might have introduced too many air bubbles.
- If you are in a rush and have space in your fridge, roll out the dough between two sheets of parchment paper before chilling it. Place it on a baking sheet (with the parchment paper) and chill until firm but malleable.
- This recipe yields a lot of dough and it’s better to work only with what you need. Why? 1) It will be easier to roll out the dough if there is less. 2) You shouldn’t overwork the dough by rolling it out several times. This would cause too much gluten formation leading to a tough and elastic dough that shrinks in the oven. You might like to read How much dough is needed for a specific pan size.
- Homemade almond flour: Place blanched almonds in a small food processor bowl and process until ground, scraping the bottom edges of the bowl occasionally. Be careful not to mix for too long so you don’t end up with almond butter. Since the quantity needed for this recipe is quite small, it’s best to make a larger batch (about 100 g/3.5 oz.). Simply chill leftover flour in an airtight container for another use.
- You might like to read how to line a tart pan with pastry if you’re not sure how to do this.
- Recipe adapted from Pierre Hermé’s pâte sucrée.