

This small batch recipe for chocolate Bavarian cream features a rich chocolate custard that has been paired with whipped cream for a wonderful airy texture. Served in individual cups for a quick dessert or as part of a more elaborate multilayer cake, chocolate Bavarian cream is one of those easy, make-ahead desserts.

What Is Bavarian Cream?
Bavarian cream is a custard (crème Anglaise) lightened with whipped cream and set by gelatin. It is a type of mousse that can be used in numerous desserts like charlottes and Bavarian cakes.
The custard base can be flavored with whatever you like. You could add vanilla, fruit puree as I’ve done in the strawberry charlotte or chocolate as we’ll be doing today.
Ingredients
Crème Anglaise
Crème Anglaise is similar to pastry cream but it is thickened solely with egg yolks. Since it does not contain any cornstarch or flour, it isn’t as thick as pastry cream and is more like a sauce. To make crème Anglaise you will need:
- Liquid: I like to use a combination of milk and heavy cream. It’s best to use whole milk and heavy cream with a 35% fat content for optimal flavor and texture.
- Egg yolks: For richness, flavor and to thicken the custard base. You’ll generally need to add between 20-35% the amount of liquid in the base. Using more than that might give the custard an eggy taste. You can save the egg whites to make French meringue cookies or coconut macaroons.
- Sugar: For sweetness. You can adjust the amount of sugar based on your preference and the chocolate you are using.
Chocolate
We’ll be flavoring the crème Anglaise with chocolate. You’ll need dark chocolate for a deep, rich chocolate flavor. I use 65% couverture chocolate. Try to choose a chocolate with a similar cocoa percentage. If the cocoa percentage is too low, the chocolate Bavarian cream won’t set properly and the chocolate flavor will be too mild.

Gelatin
You’ll need a little bit of gelatin powder to set the Bavarian cream. It’s best to weigh the gelatin powder. If you add too much, the Bavarian cream will be too stiff and rubbery.
We have to bloom the gelatin powder before using it. To do so, we’ll mix it with a small amount of cold milk and let it sit for 5-10 minutes before using it. Since we’ll be adding it to a hot base (the cooked crème Anglaise), we don’t have to heat it to dissolve the granules.
The gelatin will yield an airier, more stable mousse but it isn’t absolutely essential and you can skip it if you’d rather not use any.
Whipped cream
The whipped cream is added in the last step, to lighten the chocolate custard. This process is fairly simple but there are a few things to keep in mind:
- Use heavy cream with 35% fat content. Cream with a fat content of less than 30% will not whip.
- The cream should be cold when you whip it.
- The heavy cream should be whipped to soft peaks (not stiff peaks), so that you can easily fold it into the other ingredients.
- Wait for the custard base to cool down to about 24°C to 29°C (75°F to 85°F). If you add the whipped cream to a hot base, it will melt and deflate. If you want to know more about whipped cream, check out how to make sweetened whipped cream.
How to Make Chocolate Bavarian Cream
Bloom the gelatin
- Pour the cold milk into a small bowl and sprinkle the gelatin over it. Mix it briefly using a fork then set aside.


Melt the chocolate
- Place the chocolate pieces in a large bowl (microwavable). Heat in the microwave in 20-second increments, stirring in-between, until completely melted. You can melt the chocolate in a double-boiler if you don’t want to use a microwave.


Prepare the crème Anglaise
- Pour the milk, heavy cream and part of the sugar (about 1/3) into a small pot. Heat over medium heat until simmering.


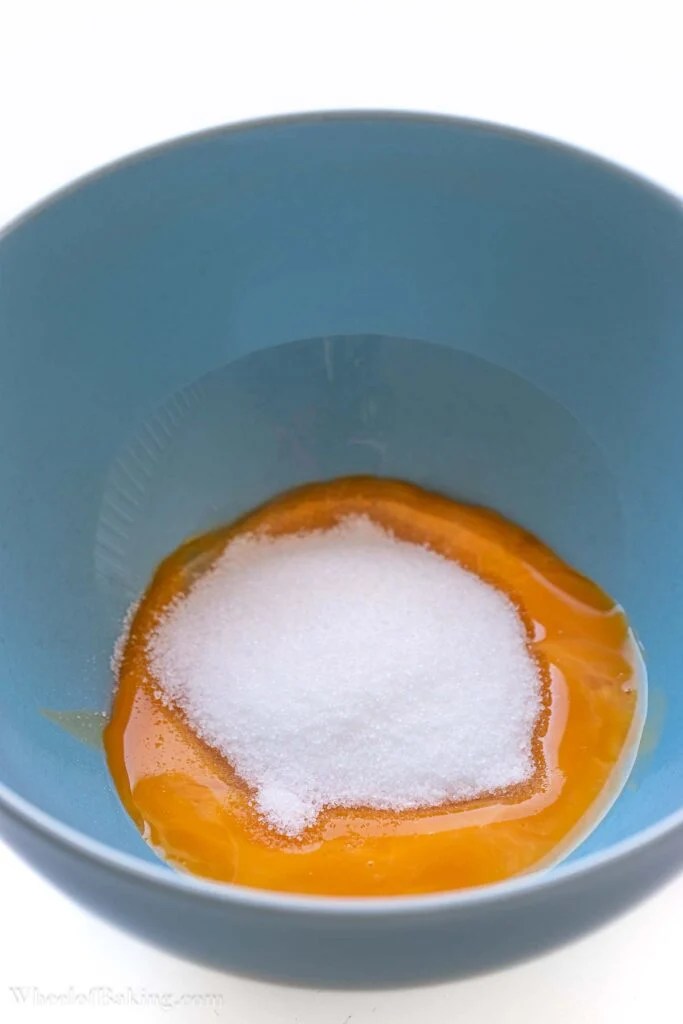
- Meanwhile, whisk the egg yolks with the remaining sugar in a bowl for about 2 minutes, until slightly lighter in color. Start whisking as soon as you add the sugar to the egg yolks to avoid getting a lumpy mixture.

- Gradually pour the hot liquids (milk/cream) into the egg mixture, whisking constantly. Add the liquids very slowly to raise the temperature of the eggs without scrambling them.


- Return the mixture to the pot. Cook over medium heat, stirring constantly with a wooden spoon (or heatproof spatula) until slightly thickened, about 3 minutes. It’s done when: The cream coats the spatula/spoon and if you run a clean finger through the spatula, the trace remains. Tip: Reduce the heat to medium-low if you notice the mixture sticking to the pot at any point.
The temperature of the crème Anglaise should not exceed 85°C (185°F) or the eggs will curdle.


Add the gelatin and chocolate
- Off the heat, add the bloomed gelatin and stir to dissolve. Tip: If the crème Anglaise isn’t completely smooth, place a fine-mesh sieve over the chocolate bowl before moving on to the next step.


- Pour the crème Anglaise over the melted chocolate in 3-4 additions, stirring from the middle and moving outwards in circles, until fully combined and smooth. Optional: Mix with an immersion blender to ensure the chocolate mixture is completely smooth.
- Set aside to cool down at room temperature, stirring occasionally with a spoon. The chocolate mixture should cool down to about 24°C to 29°C (75°F to 85°F) before adding the whipped cream. If it’s too hot, it will deflate the whipped cream. It took about 20 minutes in a 20°C/68°F kitchen.

Fold in the whipped cream
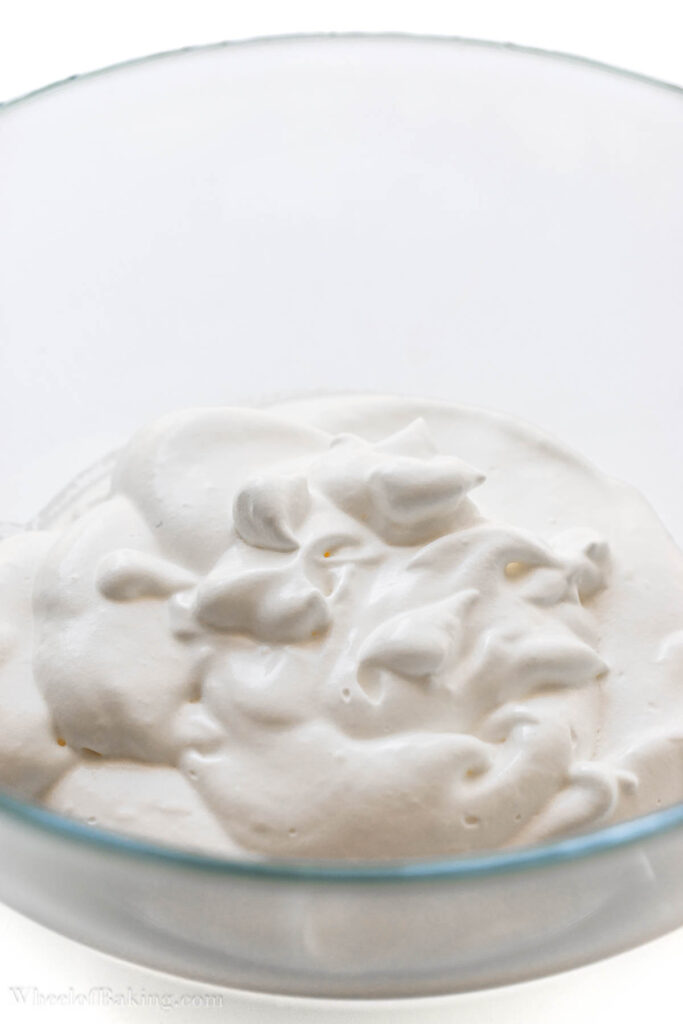
- In the meantime, pour the heavy cream into a mixing bowl and whip on medium-low speed until soft-medium peaks form. The whipped cream shouldn’t be too firm or you’ll have trouble incorporating it into the cream. Tip: Return the whipped cream to the fridge if the chocolate isn’t at the right temperature yet.
- Add a heaping tablespoon of whipped cream to the chocolate mixture (to lighten it) and mix until combined. There’s no need to be gentle when mixing at this point.


- Add the remaining whipped cream in 3 additions, carefully folding it in with a spatula to avoid deflating the cream. Mix just until you no longer see streaks of white. If you mix for too long, the air will escape and the cream will be quite dense.
- Pour into desired cups and cover tightly (without touching the surface). Chill for at least 4 hours or until completely set.


The chocolate Bavarian cream will be runny initially and will set as it cools down. You should pour it immediately into the serving cups before it firms up and becomes harder to portion.
The chocolate Bavarian cream is delicious on its own. But if you want to add some height to it, top it with sweetened whipped cream and chocolate shavings. Enjoy!

This post was originally published on February 9, 2021. I updated it with new pictures and more information.
You Might Also Like
- Dark chocolate crémeux
- Chocolate ganache with cocoa powder
- Pâte à bombe chocolate mousse
- Chocolate Lava Cake for Two
- Crème Anglaise
For more recipes with crème Anglaise, check out the crème Anglaise baking calendar or the crème Anglaise section.
LOVE THIS RECIPE? I’d be so grateful if you could leave a ⭐⭐⭐⭐⭐ rating in the recipe card below!

Chocolate Bavarian Cream
This small batch recipe for chocolate Bavarian cream features a rich chocolate custard that has been paired with whipped cream for a wonderful airy texture.
3
people15
minutes5
minutes4
hours20
minutesIngredients
- For the chocolate custard
20 g whole milk, cold (0.7 oz.)
3 g gelatin powder (1 teaspoon, 0.1 oz.)
110 g dark chocolate (65% cocoa), coarsely chopped (3.9 oz.)
50 g whole milk (1.8 oz.)
70 g heavy cream (35% fat) (2.5 oz.)
40 g white granulated sugar (1.4 oz.)
2 large egg yolks (about 36 g/1.3 oz.), at room temperature
- For the whipped cream
150 g heavy cream (35% fat), cold (5.3 oz.)
Directions
- Bloom the gelatin: Pour the cold milk (20 g/0.7 oz.) into a small bowl and sprinkle the gelatin over it. Mix it briefly using a fork then set aside.
- Melt the chocolate: Place the chocolate pieces in a large bowl (microwavable). Heat in the microwave in 20-second increments, stirring in-between, until completely melted. You can melt the chocolate in a double-boiler if you don’t want to use a microwave.
- Prepare the crème anglaise: Pour the milk, heavy cream and part of the sugar (about 1/3) into a small pot. Heat over medium heat until simmering.
- Meanwhile, whisk the egg yolks with the remaining sugar in a bowl for about 2 minutes, until slightly lighter in color. Start whisking as soon as you add the sugar to the egg yolks to avoid getting a lumpy mixture.
- Gradually pour the hot liquids (milk/cream) into the egg mixture, whisking constantly. Add the liquids very slowly to raise the temperature of the eggs without scrambling them.
- Return the mixture to the pot. Cook over medium heat, stirring constantly with a wooden spoon (or heatproof spatula) until slightly thickened, about 3 minutes. It’s done when: The cream coats the spatula/spoon and if you run a clean finger through the spatula, the trace remains. Tip: Reduce the heat to medium-low if you notice the mixture sticking to the pot at any point.
- Off the heat, add the bloomed gelatin and stir to dissolve. Tip: If the crème Anglaise isn’t completely smooth, place a fine-mesh sieve over the chocolate bowl before moving on to the next step.
- Pour the crème Anglaise over the melted chocolate in 3-4 additions, stirring from the middle and moving outwards in circles, until fully combined and smooth. Optional: Mix with an immersion blender to ensure the chocolate mixture is completely smooth.
- Set aside to cool down at room temperature, stirring occasionally with a spoon. The chocolate mixture should cool down to about 24°C to 29°C (75°F to 85°F) before adding the whipped cream. If it’s too hot, it will deflate the whipped cream. It took about 20 minutes in a 20°C/68°F kitchen.
- Whip the heavy cream: In the meantime, pour the heavy cream into a mixing bowl and whip on medium-low speed until soft-medium peaks form. The whipped cream shouldn’t be too firm or you’ll have trouble incorporating it into the cream. Tip: Return the whipped cream to the fridge if the chocolate isn’t at the right temperature yet.
- Add a heaping tablespoon of whipped cream to the chocolate mixture (to lighten it) and mix until combined. There’s no need to be gentle when mixing at this point.
- Add the remaining whipped cream in 3 additions, carefully folding it in with a spatula to avoid deflating the cream. Mix just until you no longer see streaks of white. If you mix for too long, the air will escape and the cream will be quite dense.
- Pour into desired cups and cover tightly (without touching the surface). Chill for at least 4 hours or until completely set. Enjoy!
Notes
- Make-ahead tip: Chocolate Bavarian cream can be chilled, tightly covered, for up to 2 days. Keep away from foods with strong odors.
- Chocolate: I use 65% couverture chocolate. Try to choose a chocolate with a similar cocoa percentage. If the cocoa percentage is too low, the chocolate Bavarian cream won’t set properly and the chocolate flavor will be too mild.
- Gelatin: It’s best to weigh the gelatin powder. If you add too much, the Bavarian cream will be too stiff and rubbery. The gelatin will yield an airier, more stable mousse but it isn’t absolutely essential and you can skip it if you’d rather not use any. If you do skip it, add the 20 g/0.7 oz. of milk to the crème Anglaise in step 3 (so use equal amounts of milk and heavy cream, 70 g/2.5 oz. each).
- Whipped cream: Use heavy cream with 35% fat content. Cream with a fat content of less than 30% will not whip.
- Sugar: You can adjust the amount of sugar based on your preference and the chocolate you are using.
- The temperature of the crème Anglaise should not exceed 85°C (185°F) or the eggs will curdle.
- The chocolate Bavarian cream will be runny initially and will set as it cools down. You should pour it immediately into the serving cups before it firms up and becomes harder to portion.
- You can save the egg whites to make French meringue cookies or coconut macaroons.