

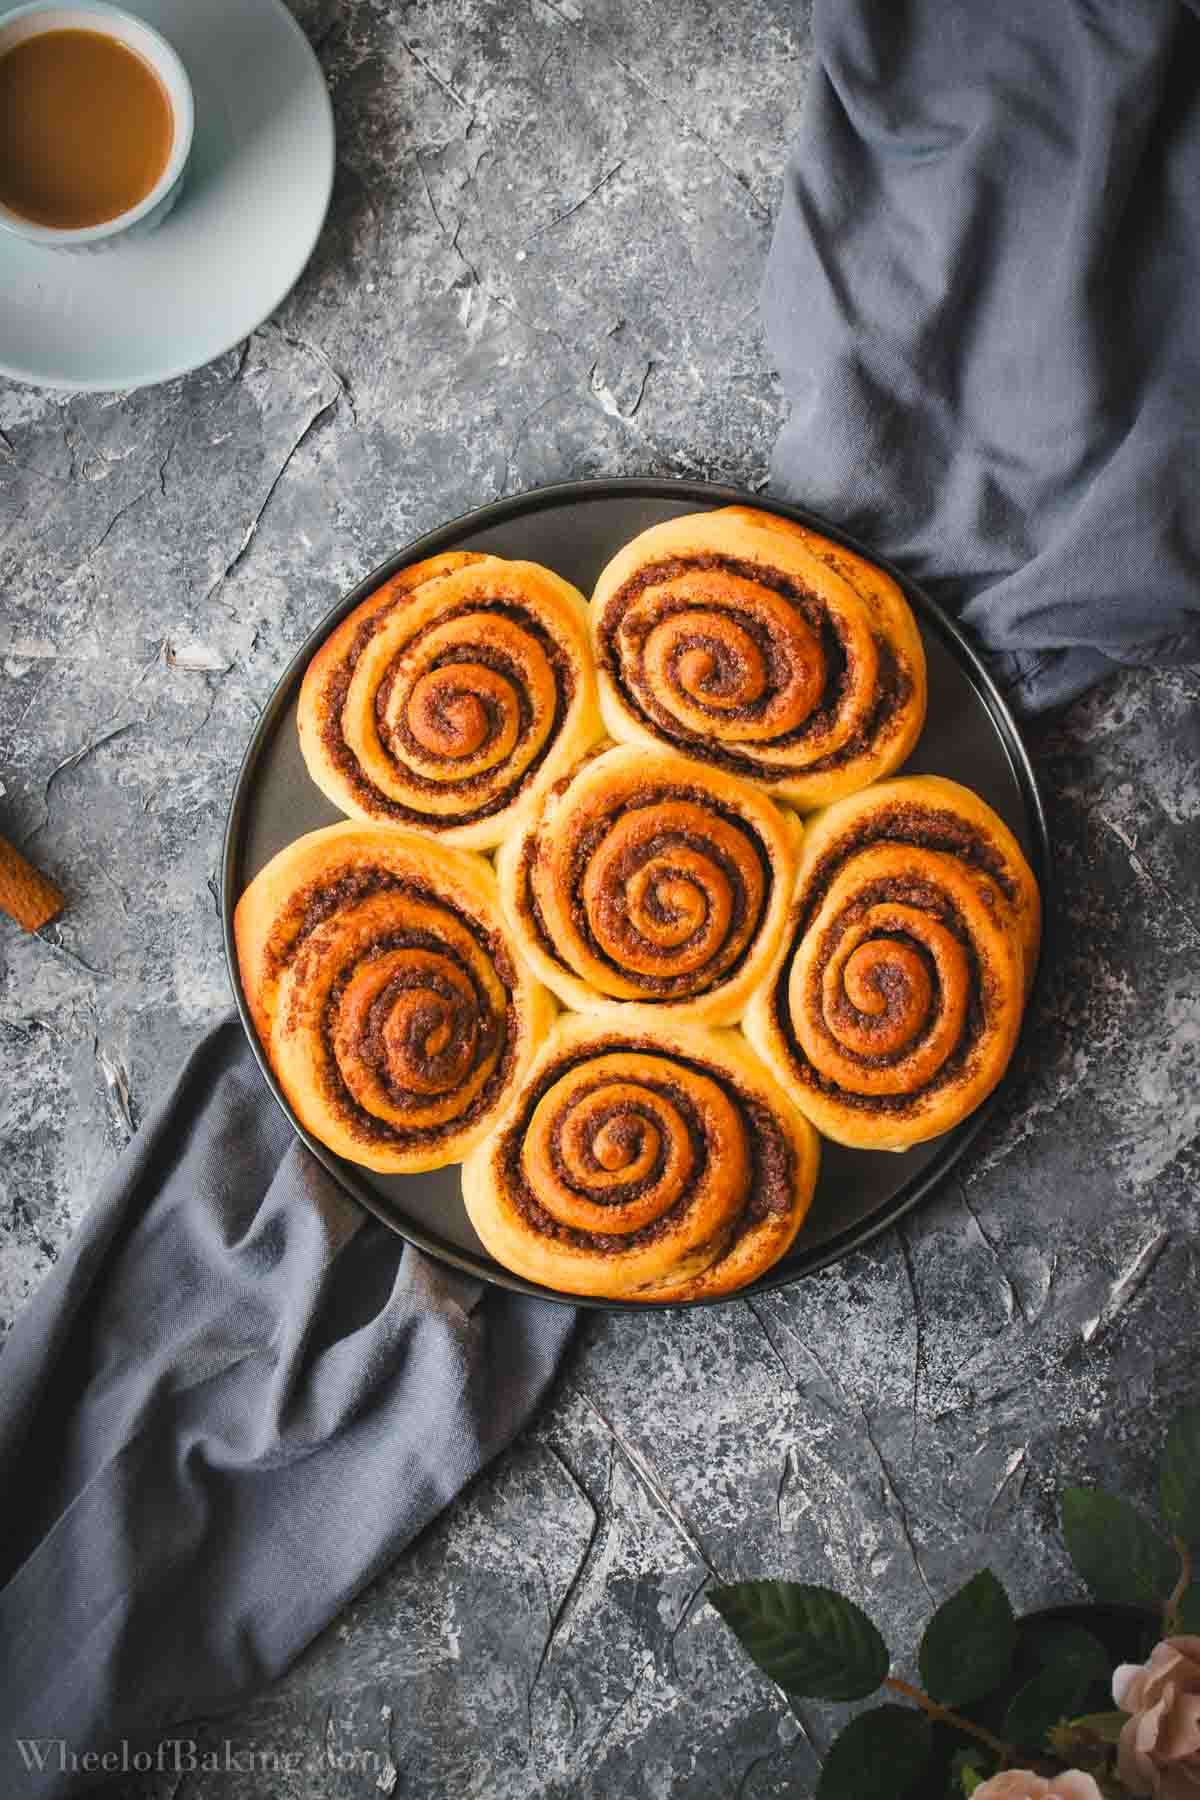
So tender and packed with cinnamon flavor, these Tangzhong cinnamon rolls will keep well for days. This small batch recipe is enough to make 6 small rolls, baked in an 8 inch pan.
As I was eagerly flipping through the pages of King Arthur’s Baking School book, I came across the Perfect Pillowy Cinnamon Rolls recipe which uses the Tangzhong method to give the rolls an incredible texture and longer shelf life.
What is Tangzhong?
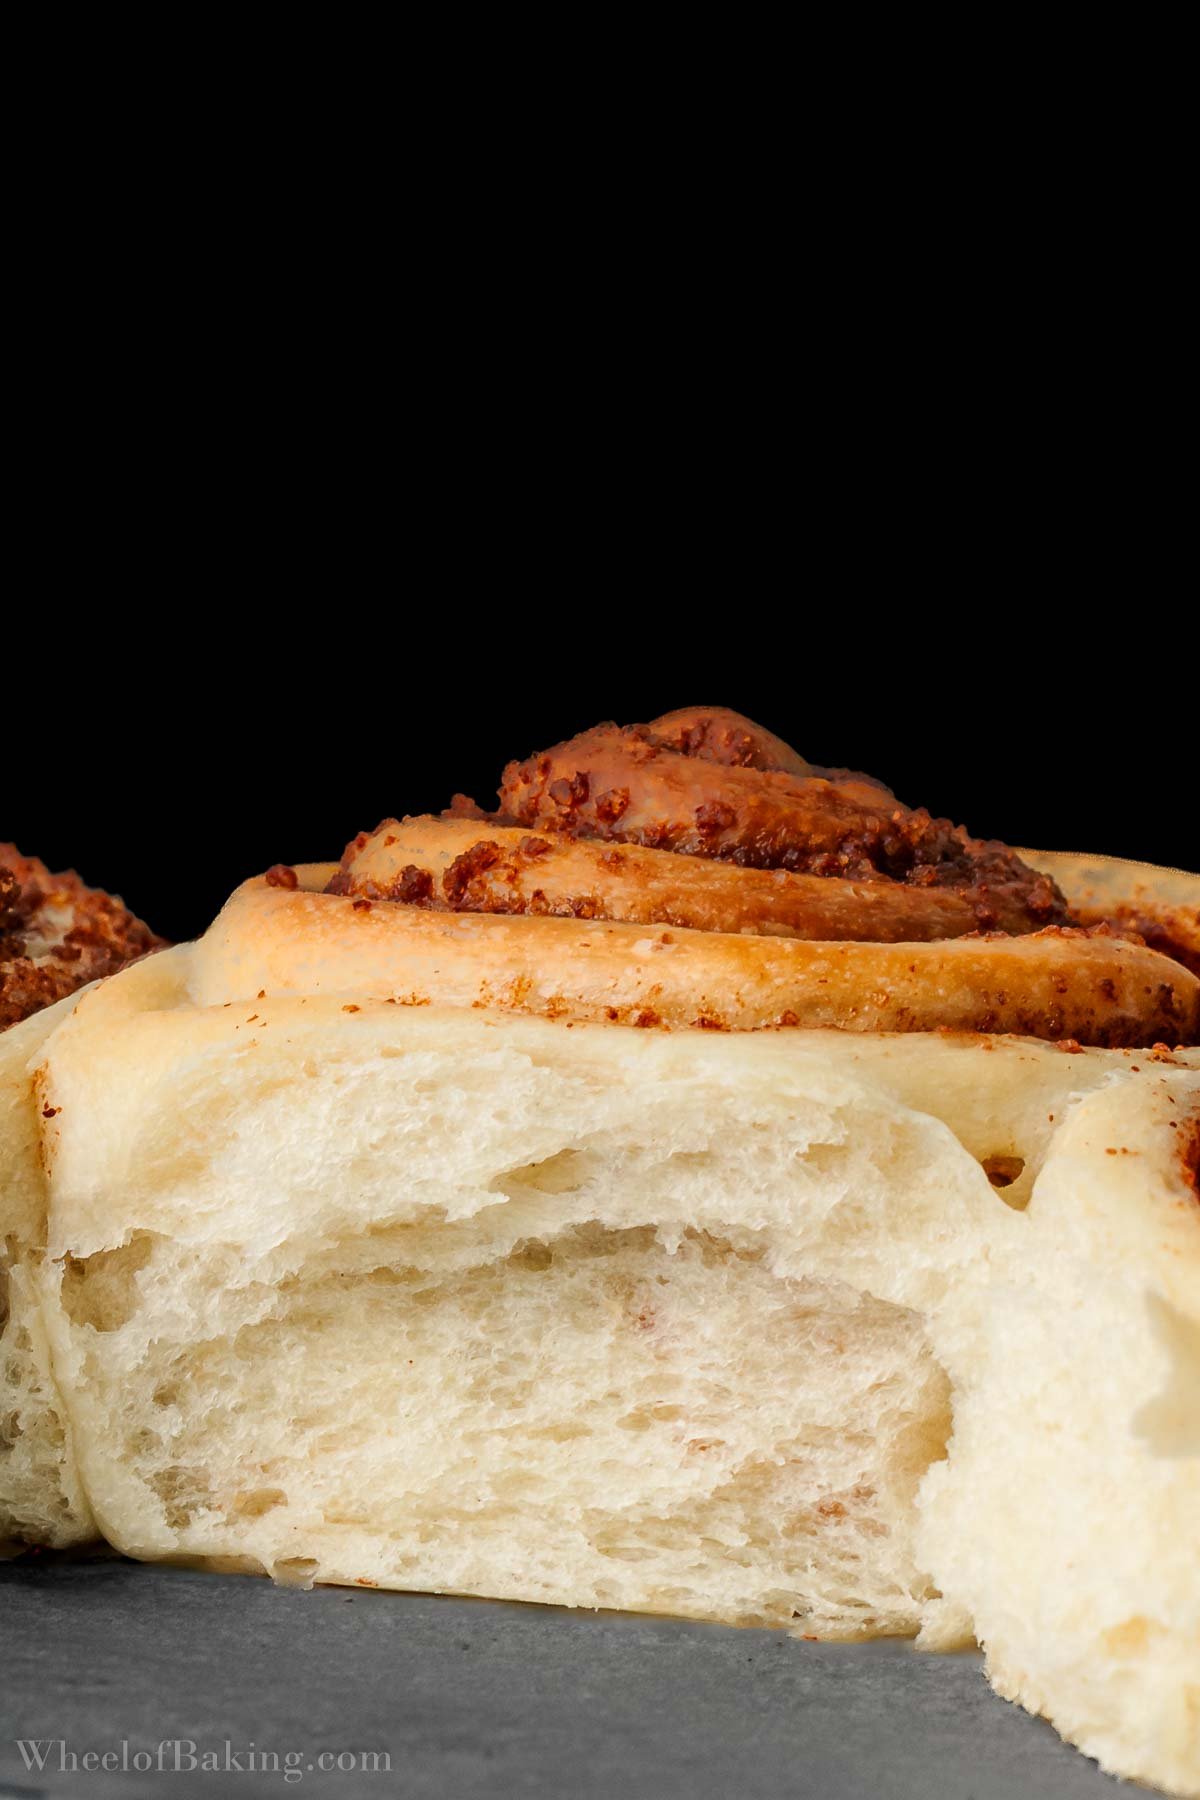
The Tangzhong method is an Asian technique made popular by Yvonne Chen’s book “65°C Bread Doctor”. It involves cooking a little bit of flour with a portion of the liquid in the recipe until a paste forms before mixing it with the remaining ingredients. The starches in the cooked flour gelatinize and are able to hold onto more water than if you had simply mixed all the ingredients together without heat. More water in the dough translates to more steam during baking which helps the dough rise and yields lighter and fluffier rolls. More water also means you won’t be disappointed with dry rolls if you save some for the next day.
Why You’ll Love This Recipe
- Delicious: These cinnamon rolls are seriously good and they keep very well for a few days if there are any left!
- Small batch: Not sure if that’s a good selling point or a bad one as I’m dreaming of the next batch I’ll make! But if you’d like to indulge without making a large portion, this is the perfect recipe. And you could easily double the amounts if you’d like to feed a crowd.
- Customizable: You can easily make the rolls larger, or even smaller, use less filling, add different spices or chocolate chips etc…
- Egg free: No need to crack eggs for this recipe.
Ingredients
For the dough
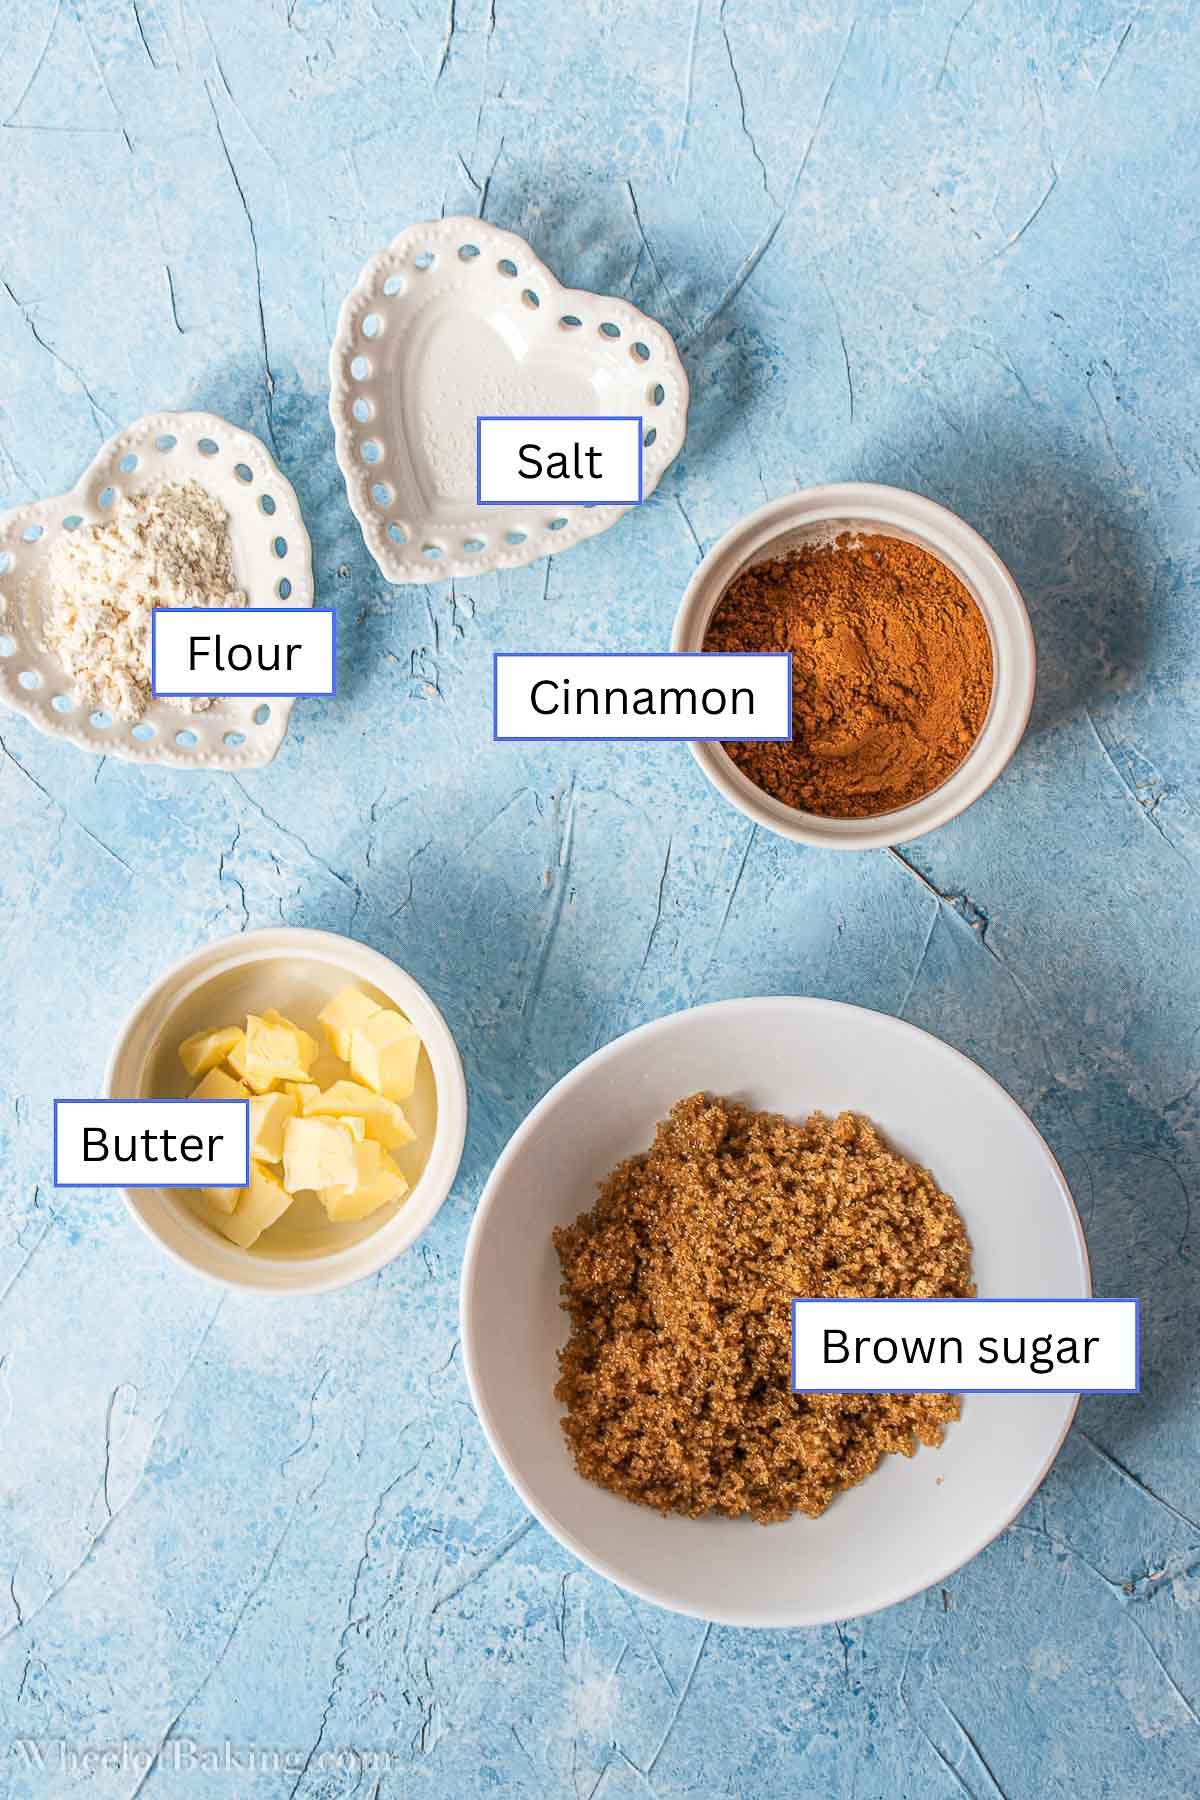
- Bread flour: For structure. We’re adding quite a bit of liquid in the dough for incredibly soft rolls that last longer. So you’ll need to use bread flour with a high protein content which can absorb more liquid than all-purpose flour. I’m using bread flour with 13% protein content (shown in the nutritional table found on the flour packaging).
- Milk: We’re not using any eggs in this recipe so we’re using quite a bit of milk for hydration, 86% the amount of flour!
- Butter: Unsalted butter, to add richness and flavor to the dough. I added more than the original recipe (by King Arthur Baking) for even softer, richer rolls. I use European style butter which is 82% fat.
- Yeast: Instant yeast, for rise and flavor. No need to dissolve it in liquid, we’re just adding it to the other ingredients.
- Sugar: Source of food for the yeast, a little bit of sweetness, browning and to make the rolls last even longer without drying out. I’m using double the amount called for in the original recipe.
- Salt: To enhance all the flavors, strengthen the gluten network and keep fermentation under control.

For the filling
- Sugar: I like to use dark brown sugar, for a deep flavor with caramel undertones. You could use light brown sugar if you prefer.
- Cinnamon: The star of the filling! Use as much or as little as you want. I like using a generous amount for a nice cinnamon kick. Avoid using old cinnamon which might have become a little bland.
- Butter: We’ll be adding just a little bit of melted butter to the filling so it sticks to the dough. If you add too much butter, the filling will become clumpy and hard to spread. It might also bubble up a lot during baking covering up the swirls or leaking. Some recipes call for spreading softened butter on the dough first, then sprinkling the filling. I found this method a little too messy as the dry filling doesn’t stick to the dough properly and tends to spill from the sides whilst rolling. Feel free to use whatever method you are most comfortable with.
- Salt: A pinch, to make all the flavors shine.
- Flour: Optional, but recommended so the filling stays put during baking.
Step-by-Step Instructions
Making the dough
Let’s start by making the Tangzhong.
- Simply whisk together a little bit of flour and milk in a saucepan until there are no flour lumps left.
- Cook until thickened.


- Transfer to the mixing bowl then pour cold milk over it to cool it down.
- Top with the remaining flour.


- Add the sugar and salt.


- Then add the yeast and diced butter.


- Mix on low speed to combine the ingredients then increase the speed and keep kneading until elastic.


It’s a small portion and the dough might get splattered onto the sides of the bowl. Just stop the mixer occasionally to scrape the bowl and you’re good to go!


- Once the dough has been kneaded enough, shape it into a ball then cover and let it rise until puffy.


Windowpane test: To determine if the dough is ready, try slowly stretching a small piece of dough into a thin layer (with lightly oiled hands as the dough is quite sticky). If it doesn’t tear, it’s ready.


Making the filling
While you’re waiting for the dough to rise, you can start preparing the filling.
- Mix together sugar, cinnamon, flour and salt.


- Then add a little bit of melted butter and mix until evenly incorporated.


Shaping the rolls
Time to shape those rolls.
- Gently punch down the dough.


- Place it onto a lightly floured piece of parchment paper or work surface.
- Start patting it into a rectangle. You can then use a rolling pin to finish rolling it out.


Tip: You can use the parchment paper as a guide to get a neat rectangle. Fold it over the dough to contain the dough, creating a rectangle of desired size than flip over and start rolling out the dough.
- Sprinkle the filling over the dough.


- Then spread evenly with the back of a spoon or your hands.
Once that’s done, you have two options: roll into a log, or cut strips. Let’s start with the most common (and slightly speedier option):
- Roll tightly into a log. You can use the parchment paper to roll the dough if it’s too sticky or chill it briefly.


Tip: To avoid having to trim off messy edges, place your hands on the edges first as you roll to keep a straight line then roll the center when needed.
- Once you have a cylinder, mark the dough with a knife to divide it into equal pieces.
- Then slice it with a serrated knife or by sliding a dental floss under the dough and crossing it over to get a neat roll.


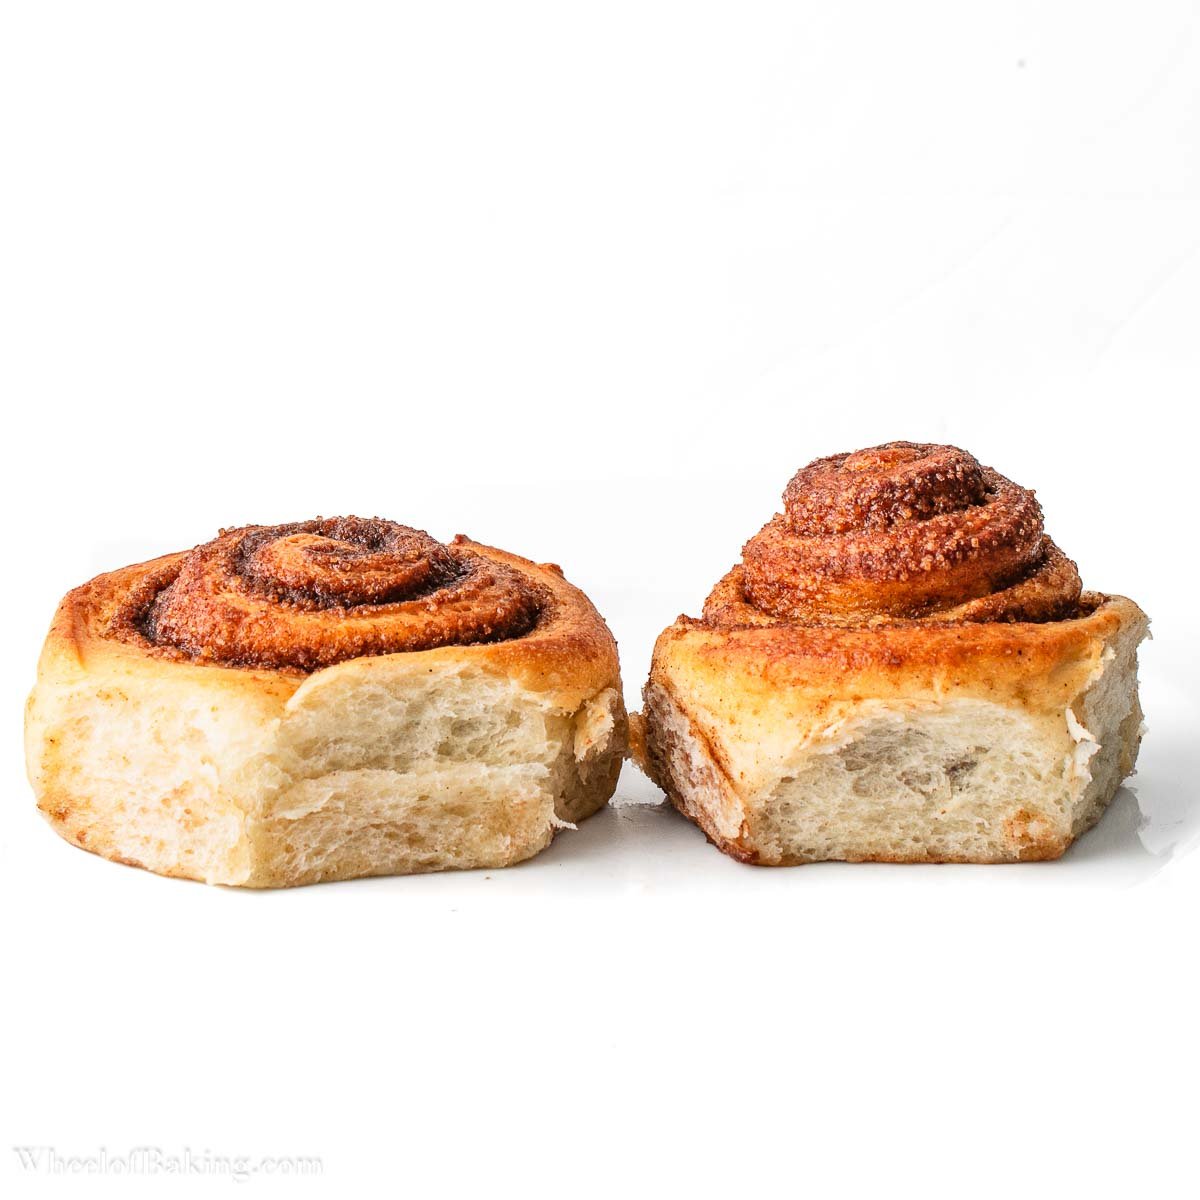
Just as a side note to give you an idea, this is what might happen if you spread softened butter on the dough then sprinkle the filling over it. Even if you press down with a rolling pin, quite a bit of cinnamon sugar will fall from the sides. It will still taste great. It just might not be as tidy. Up to you to choose your favorite method.


Alternate method of shaping
Instead of rolling the dough into a log after spreading the filling, you can cut strips with a pizza cutter. Then simply roll each strip onto itself to get those nice swirls.
Pros: You have more control over the swirls. It’s much easier to roll thin strips tightly rather than the whole log.
Cons: A little more time consuming and you’ll need to roll out the dough into a wider rectangle to get the same number of rolls as the log. The log naturally gets wider as you apply pressure when rolling.


Baking the rolls
- Place the shaped rolls into a greased pan lined with parchment paper. Let them rise until puffy then bake until golden brown and enjoy!


Troubleshooting Cinnamon Rolls
Dry cinnamon rolls
- Too much flour: It’s always best to weigh the flour to avoid accidentally adding more than needed which would yield dry cinnamon rolls. The dough is supposed to be quite sticky but should be easy to handle with oiled hands once it has been kneaded enough. Only add more flour if it’s impossible to handle after at least 10 minutes of kneading and add very gradually (not more than 1 tablespoon at a time). When rolling out the dough, sprinkle very lightly with flour and remove any excess.
- Overbaked: Try baking for a little less time or at a slightly lower temperature next time. Using a digital thermometer inserted into the center of a roll might be the best way to determine when the cinnamon rolls are ready so you don’t end up with underbaked or overbaked rolls. Aim for an internal temperature of about 88°C/190°F.
- Not stored properly: Don’t leave the cinnamon rolls uncovered for too long. It’s best to place them in an airtight container once they have cooled down or wrap them well in plastic wrap.
Dense cinnamon rolls
If the rolls don’t rise properly, you’ll end up with dense cinnamon rolls instead of a light and fluffy texture.
- Expired/dead yeast: If you’re using old yeast or add the yeast directly over the hot Tangzhong, the dough won’t rise properly (or at all), leading to tough and dense rolls.
- Underfermented/underproofed: The dough should ideally be left to rise in a warm environment, at around 24°C/75°F. If your kitchen is very cold, it will take longer for the dough to rise. Try placing the dough in a warm spot such as a turned off oven with the light switched on. Use visual cues instead of time to determine when the dough is ready: the dough should have visibly increased in volume during the first rise and a finger indentation on the shaped dough should slowly bounce back after the second rise.
- Not enough structure: When kneading the dough, the proteins in flour will form gluten which gives the dough strength and elasticity. If the protein content of your flour is too low or if you don’t knead the dough until it is elastic, the gluten structure will be too weak to trap the gas bubbles created by the yeast and the dough won’t rise properly. You should ideally use bread flour with a protein content of about 13% and knead for at least 10 minutes or until a small piece of dough can be stretched without tearing (windowpane test). Using less flour than needed will also result in a weak structure.
- Overproofed: If the dough is left to rise for too long, the gluten structure will start to weaken. As a result, the dough might deflate during baking yielding dense rolls. If you created an indentation with your finger that didn’t bounce back at all after the second rise, the dough was probably overproofed.
- Too much flour/not enough liquid: The dough should be sticky but manageable with lightly oiled hands once properly kneaded. If you add more flour than needed in an attempt to reduce the stickiness, the dough won’t rise properly and you’ll end up with dense and dry cinnamon rolls.
Shaping issues
- The center of the roll pops out during baking: This is most likely due to rolling the dough too tightly or crowding the rolls in the pan. Try loosening the rolls a little and/or using a slightly larger pan next time.
- The rolls unravel during baking: To prevent this from happening, try placing the seam towards the edges of the pan so it can’t unravel as it rises. Alternatively, you could tuck the ends under the rolls to keep them in place.
You Might Also Like
- Vienna bread
- French milk bread
- Brioche Suisse (with pastry cream and chocolate chips)
- Savarin cakes
LOVE THIS RECIPE? I’d be so grateful if you could leave a ⭐⭐⭐⭐⭐ rating in the recipe card below!

Tangzhong Cinnamon Rolls (Small Batch)
So tender and packed with cinnamon flavor, these Tangzhong cinnamon rolls will keep well for days. This small batch recipe is enough to make 6 small rolls, baked in an 8 inch pan.
)
6
rolls50
minutes20
minutes2
hoursIngredients
- For the Tangzhong
60 g whole milk (2.1 oz., 1/4 cup)
12 g unbleached bread flour (0.42 oz., 1 and 1/2 Tablespoons)
- For the dough
80 g whole milk (2.8 oz., 1/3 cup), cold
150 g unbleached bread flour (5.3 oz., 1 and 1/4 cups)
25 g white granulated sugar (0.9 oz., 2 Tablespoons)
1/2 teaspoon salt (3 g/0.11 oz.)
3 g instant yeast (0.11 oz., 1 teaspoon)
40 g unsalted butter, diced and softened but still cold (1.4 oz., 3 Tablespoons)
- For the filling
75 g dark (or light) brown sugar (2.6 oz., 1/3 cup)
8 g unbleached bread flour, optional (0.28 oz., 1 Tablespoon)
6 g ground cinnamon (0.2 oz., 3/4 Tablespoon), or to taste
pinch of salt
14 g unsalted butter, melted (0.5 oz., 1 Tablespoon)
- For brushing the hot rolls (optional)
10 g unsalted butter, melted (0.35 oz., 3/4 Tablespoon)
- For the icing (optional)
25 g powdered (icing) sugar, ideally sifted (0.9 oz., 3 Tablespoons)
4 g boiling water (0.14 oz., 3/4 teaspoon), or as needed
Directions
- Making the Tangzhong: Whisk together the milk and flour in a small saucepan until there are no more flour lumps.
- Cook over medium-high heat, whisking constantly until a paste forms, about 3 minutes.
- Remove from the heat and transfer to the bowl of a stand mixer fitted with the paddle attachment.
- Making the dough: Pour the cold milk over the hot tangzhong to cool it down then top with the flour followed by the sugar, salt, yeast and butter. Tip: Don’t add the yeast immediately over the hot tangzhong as the yeast shouldn’t be exposed to a high temperature (which would kill it).
- Mix on low speed to combine the ingredients for about a minute then increase the speed to medium-low (speed 3-4 on a KitchenAid). Keep mixing until the dough is smooth and elastic (about 10-15 minutes), stopping the mixer occasionally to scrape the bowl. Windowpane test: To check if it’s ready, try slowly stretching a small piece of dough into a thin layer (with lightly oiled hands as the dough is quite sticky). If it doesn’t tear, the dough is ready. Tip: Avoid adding more flour than called for in the recipe unless absolutely necessary (after at least 10 minutes of kneading) so you don’t end up with dry and dense cinnamon rolls.
- Shape the dough into a ball by tucking the sides under and smoothening the surface (with lightly oiled hands). Place back in the mixing bowl (or a clean bowl) and cover with cling film.
- First rise: Let it rise in a warm place (about 24°C/75°F) free from drafts until puffy, about 60 to 90 minutes. If your kitchen is very cold, place the dough near a heater, or in a turned off oven with the light on. If your kitchen is too warm, try finding a cooler spot in the house.
- Preparing the filling: In the meantime, briefly mix together the sugar, flour, cinnamon and salt. Break up any brown sugar clumps with the back of a spoon. Then add the melted butter and mix until evenly incorporated (it will look like damp sand). Set aside.
- Line the bottom of a 20 cm (8 inch) springform pan with parchment paper and grease the sides.
- Shaping the rolls: Gently punch down the dough then pat it into a rectangle on a lightly floured piece of parchment paper (or work surface). Roll out (or keep using your hands) into a 35 x 18 cm (14 x 7 inch) rectangle. Tip: Roll out the dough inside a folded piece of parchment paper of desired rectangle size (see pictures in post if needed). The parchment paper will contain the dough and serve as a guide for a neat shape.
- Position the dough so that the shorter sides are at the top and bottom. Sprinkle the filling over the dough, leaving a 1 cm (0.4 inch) border on the top edge. Then carefully spread evenly and lightly press down into the dough with the back of a spoon (so it sticks). Tip: Briefly chill or freeze the dough if it feels too soft at any point. Just be careful not to leave it for too long in parchment paper as it might stick.
- Slice the dough lengthways into 6 equal strips, about 3 cm (1.2 inch) each. Roll each strip onto itself then lightly press the edge to seal. Place in prepared baking pan, neater side up, with the seam towards the edges of the pan (so they don’t unravel), leaving a little bit of space between them. Tip: The rolls will puff up during the second rise and in the oven. If you crowd them too much (or roll them too tightly), they’ll rise upwards.
- Second rise: Cover the rolls loosely with parchment paper and let them rise until puffy, 30-60 minutes. To check if they’re ready, lightly press with a finger to create a small indentation. If the dough bounces back immediately, it needs more time. If it slowly bounces back, it’s ready to be baked. If it doesn’t bounce back, it’s overproofed and might collapse when baked, yielding dense rolls.
- Baking the rolls: Start preheating the oven to 190°C (374°F, conventional setting) before the end of the rise time.
- Uncover the rolls and bake in the middle of the oven until golden brown, about 18-22 minutes. A toothpick inserted into the center of the roll will come out clean and a digital thermometer will register about 88°C/190°F. Be careful not to overbake them so they don’t come out dry.
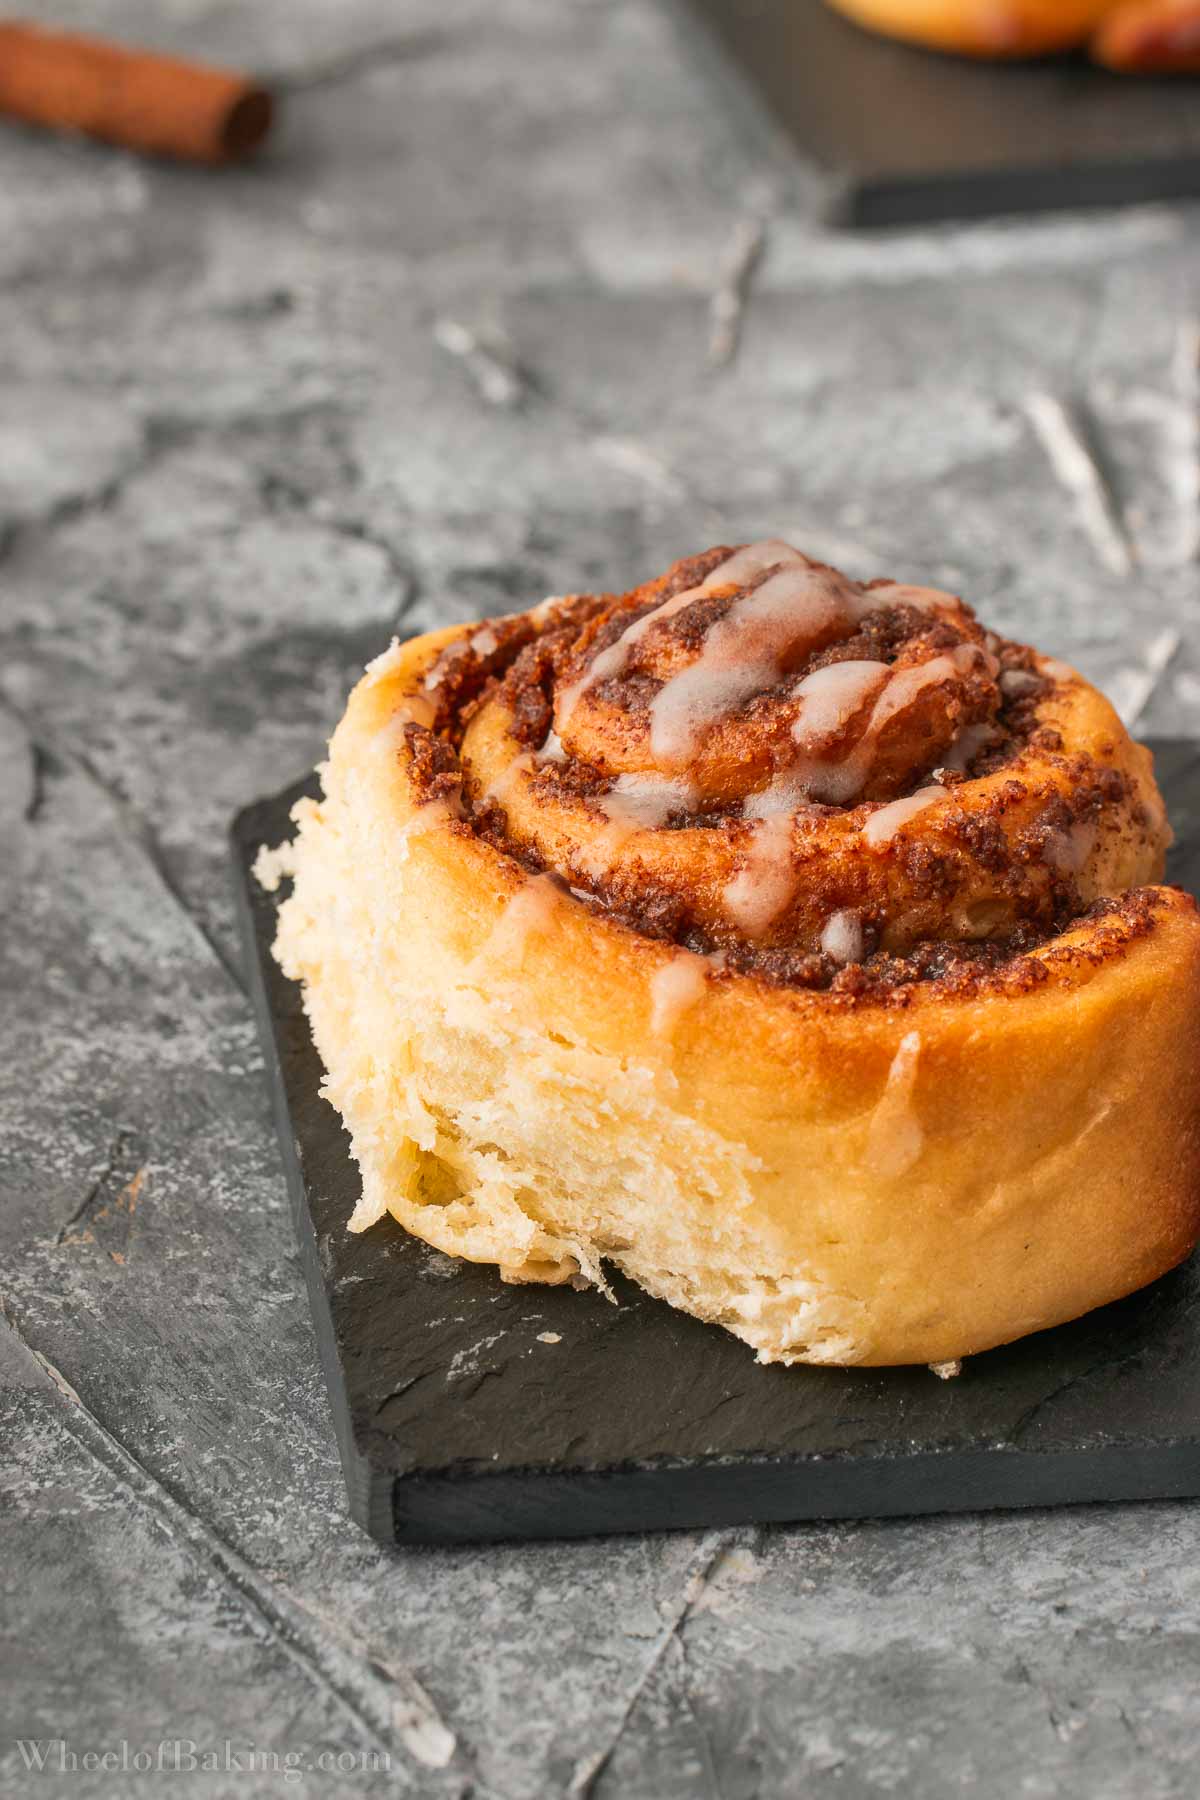
- Remove from the oven and brush with melted butter if desired, for a little bit of shine and even more softness. Cool down briefly in the pan (about 10 minutes) and enjoy! Tip: Drizzle with icing just before serving if desired.
- Optional: To make the icing, place the powdered sugar in a bowl and pour a little bit of boiling water over it. Stir to combine. Add as much water as needed to reach desired consistency and stir until smooth. Cool down briefly if needed to thicken then drizzle over the cinnamon rolls.
Notes
- Make-ahead tips: The dough can be made the night before until step 6. Then place the dough in a lightly greased bowl and turn the dough once (to coat the surface so it doesn’t dry out). Cover well and chill overnight. Proceed with step 8 the next morning. Baked cinnamon rolls will keep at room temperature for 2-3 days, in an airtight container or covered well with plastic wrap (once fully cooled down) so they don’t dry out.
- Bread flour: You should ideally use bread flour with a protein content of about 13% (usually written in the nutritional table of the packaging). The dough will be sticky but easy to handle with lightly oiled hands once kneaded enough. Using low protein flour might lead to dense rolls that don’t rise properly.
- Filling: Feel free to adjust the amount of cinnamon to your liking. Avoid using old cinnamon which might have become a little bland. The bread flour in the filling is optional but keeps the filling from leaking.
- Mixing speed: If you’d rather knead the dough at a lower speed (step 5), mix at the lowest speed for 1 minute to combine the ingredients then increase to speed 2, if using a KitchenAid. Just note that it will take a bit longer to get an elastic dough.
- Cold kitchen: Place the dough in the middle of a switched off oven with a cup of boiling water (bottom rack) until it’s time to preheat the oven. The warm, humid environment will help the dough rise.
- Rolling out the dough (step 10): The size of the rectangle will depend on desired thickness and appearance. The size mentioned in the recipe will yield several thin swirls. The shorter the long edge of the rectangle, the less swirls you’ll get. Feel free to roll out the dough to a smaller rectangle if you prefer thicker swirls or divide the dough into 4 rolls instead of 6 for example for taller cinnamon rolls. Just note that the baking time might vary.
- Shaping: I found that cutting the dough into strips and rolling each individually was the most foolproof method. But you could roll the dough into a log if you prefer. To do so, roll out the dough into a 35 x 15 cm (14 x 6 inch) rectangle, about 6 mm (1/4 inch) thick and spread filling, leaving a border on the top edge. Starting from the short side closest to you, roll the dough into a tight log. Then gently squeeze the roll, extending it to an 18 cm (7 inch) cylinder. Pinch the seam to seal and place down. Divide into 6 equal pieces, about 3 cm (1.2 inch) each, using a serrated knife or dental floss. Tip: To avoid having to trim off messy edges, place your hands on the edges first as you roll to keep a straight line then roll the center when needed.
- If using a springform pan, it’s best to bake on a baking sheet rather than a grill to catch any possible butter leaks.
- No springform pan? You can use a well greased cake pan and flip onto a plate/wire rack to unmold, then flip back. Alternatively, bake the rolls without a pan by simply placing on a baking sheet lined with parchment paper. Just note that the rolls will be more likely to unfold and rise randomly when they’re not confined by the edges of a pan.
- Troubleshooting tips: These cinnamon rolls should be light and fluffy. Dense rolls could be due to: 1) Expired/dead yeast, 2) Weak gluten structure if using low protein flour, insufficient kneading or overproofing 3) Not left to rise long enough, 4) Too much flour used. For more tips, scroll back up to the troubleshooting section.
- Icing: You’ll have just enough icing to drizzle over the rolls. If you’d like to cover them in icing, simply use as much powdered sugar as you’d like and gradually add boiling water as needed (usually about 16-18% the weight of sugar). Feel free to add a little bit of vanilla extract if you’d like.
- Cup measurements: Please note that these measurements are approximate. For best results, I’d recommend weighing the ingredients.
- Adapted from the Perfectly Pillowy Cinnamon Rolls found in King Arthur’s Baking School book.