
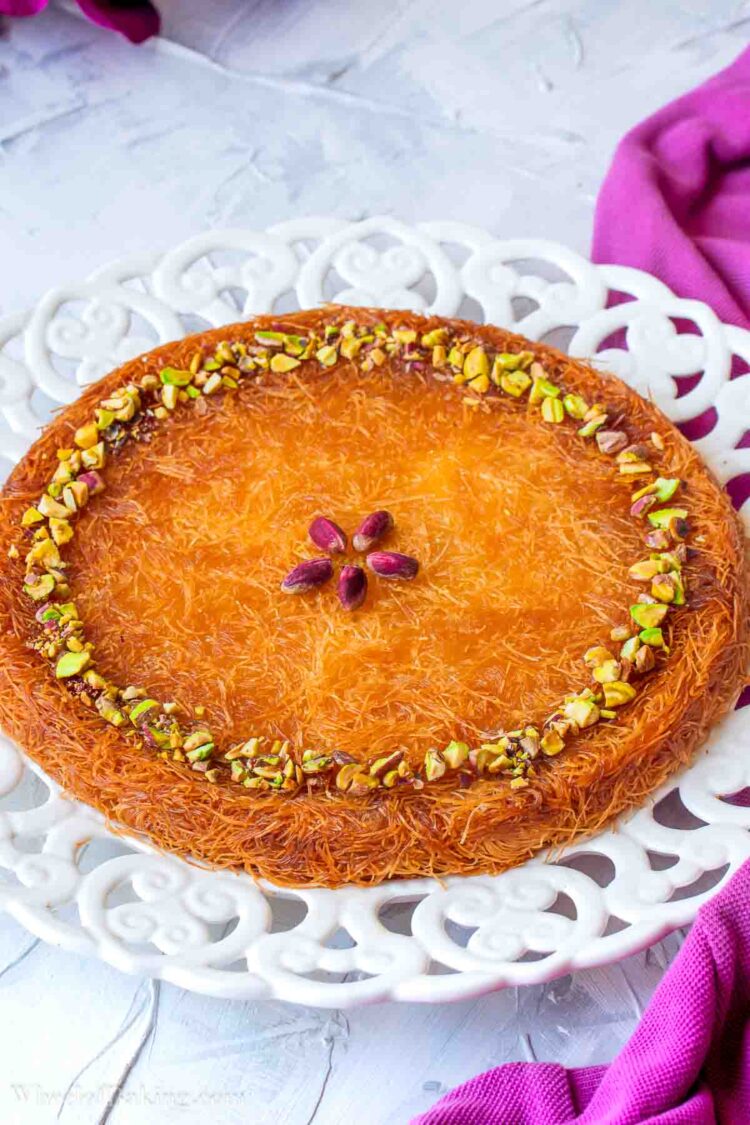
You’ll never look at cheese the same way after trying Kunefe. Kunefe is a wonderful Middle Eastern dessert consisting of shredded phyllo dough and cheese soaked in syrup.
Kunefe is a popular dessert that takes on many names and forms depending on the country. You might have come across it as Knafeh or Kunafa. It traditionally consists of three main elements: the dough, the filling and the syrup. The texture of the crust can vary, with some recipes calling for a soft semolina dough while others (like today’s) use crispy kataifi dough topped with a cheesy filling or in some cases a cream filling. Even the syrup has its own cultural variations with Lebanon for example generally opting for a floral syrup (with orange blossom or rose water). Today I’ll be sharing a Turkish inspired variation.
Why You’ll Love This Recipe
- Quick and easy: With minimal ingredients and preparation time, you’ll be able to enjoy an incredibly delicious dessert.
- No bake: No need to preheat the oven. This recipe is traditionally made on the stovetop in shallow metal pans. But baking is also an option if you prefer.
- Customizable: You can easily play around with the proportions (cheese, syrup) and even the type of cheese to make your perfect kunefe.
Ingredients
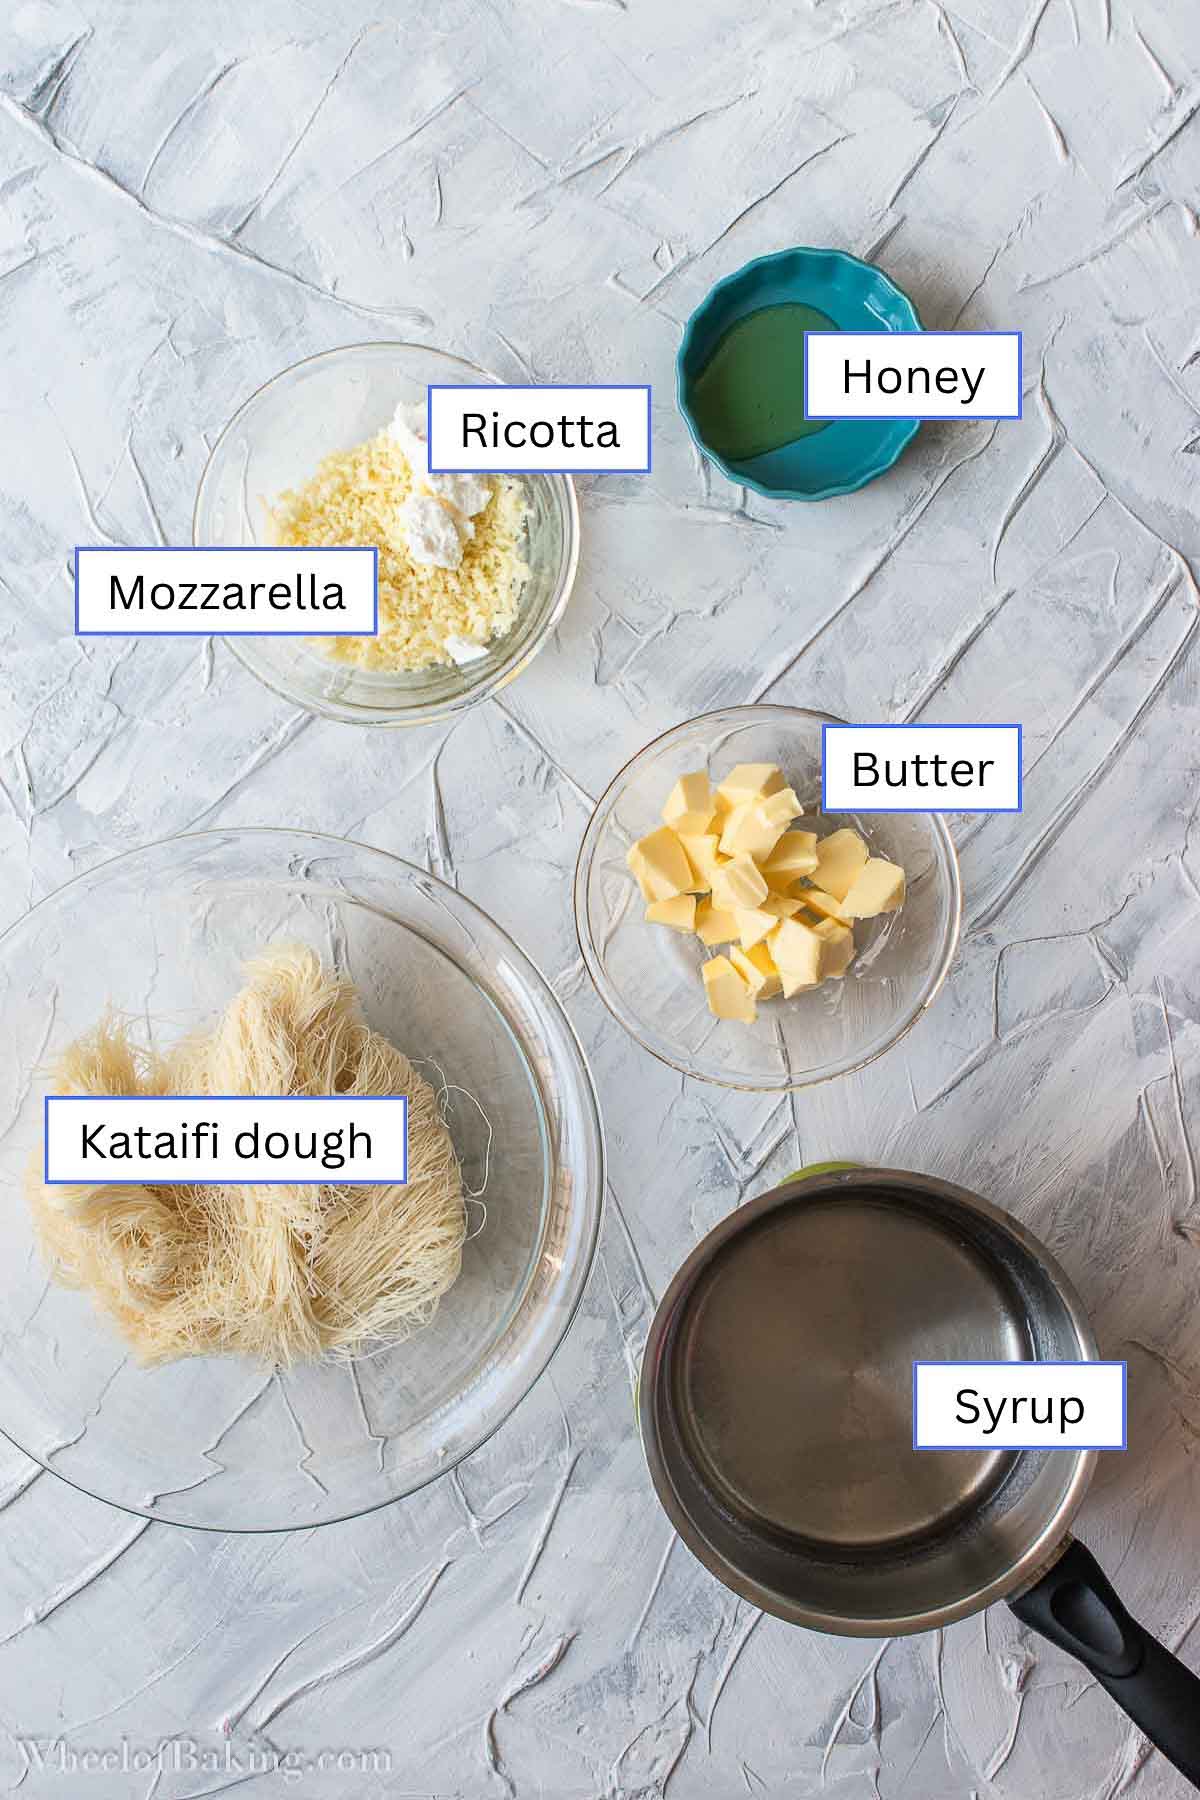
- Kataifi dough: Shredded phyllo dough that is commonly used in Middle Eastern and Greek desserts. This is the dough used to make Osmalieh. If you are unable to find it in the freezer section of your local supermarket, try looking for it in Middle Eastern or Mediterranean grocery stores. The dough should ideally be thawed in the fridge overnight. But if you forget, you can thaw it at room temperature for 2 hours before starting or as explained on the packaging. It’s best to keep this dough covered so take out only the amount of dough you’ll be working with.
- Butter: Unsalted butter, cut into small pieces and melted. We’ll be using this butter to coat the dough for richness, flavor and crispness.
- Cheese: Kunefe is made with a stretchy, unsalted cheese. Turkish kunefe is traditionally made with Hatay cheese. But as it can be hard to find, we’ll be swapping it with shredded mozzarella. We prefer the cheese layer on the thinner side but you can easily use more cheese if you want. I also like to cut the chewiness a little with creamy, ricotta cheese. You can use just mozzarella if you want. I wouldn’t recommend using more ricotta however as the kunefe loses its characteristic cheese pull.
- Syrup: To sweeten the kunefe. We’ll be making the syrup first so it has a chance to cool down before we pour it over the hot kunefe. We don’t want to cook the syrup for too long or it will thicken more than needed and it won’t spread properly in the kunefe. I find that this dessert is sweet enough but if you like your desserts extra syrupy, you can easily make a larger portion. You can flavor the syrup if you’d like with a cinnamon stick, orange blossom water, rose water etc. And you could add a few drops of lemon juice to prevent crystallization.
- Honey: We’ll be adding it to the melted butter to coat the kataifi. The honey adds a little more sweetness and a subtle flavor, as well as giving it some color. It also makes it easier to hold the kataifi dough together to press it down into the pan.
Step-by-Step Instructions
Preparing the ingredients
- Cut the butter into small pieces so it melts easily and place in a microwave safe bowl. Heat until melted then set aside.


- Mix the mozzarella and ricotta cheese until combined.


Time to prepare the kataifi dough!
- Pull those strands apart so you don’t end up with clumps and cut into smaller pieces. This can get quite messy!


- Add the honey to the melted butter and mix to combine.


- Then gradually drizzle over the dough and mix until evenly coated.


Stovetop kunefe
Time to assemble the kunefe. I’m using a simple non-stick frying pan with moderately high sides. Too deep and it might be tricky to flip the kunefe to cook the other side. Too shallow and the syrup might overflow once poured.
- Spread half the dough evenly on the bottom of the pan then top with cheese, leaving a small border.


- Cover with the remaining dough and press down to secure everything into place!
- Cook until the bottom is browned. Then for the trickiest part, flip the kunefe onto a plate then slide back down into the pan. Don’t worry, you can always tidy it up with a heatproof spatula!


- Once you’re happy with the color, remove from the heat and pour the syrup. Stand back and watch it bubble up.
- When the puddle of syrup disappears, bring out the plates and cutlery and enjoy!


Baked kunefe
If you’d like more of a hands off dessert or flipping the kunefe really isn’t your thing, you can always bake it. Follow the same process: layer of dough, cheese, more dough.


Then bake in a preheated oven until golden brown and pour the syrup over it.


And that’s it! This is one of those desserts that intrigues people and once they get a taste of it, there’s no looking back!
You Might Also Like
- Osmalieh
- Namoura (semolina cake)
- Greek Revani
LOVE THIS RECIPE? I’d be so grateful if you could leave a ⭐⭐⭐⭐⭐ rating in the recipe card below!

Kunefe Cheese Dessert (Turkish Style)
Kunefe is a wonderful Middle Eastern dessert consisting of shredded phyllo dough and cheese soaked in syrup.
)
5
people15
minutes25
minutesIngredients
90 g water (3.2 oz., 1/3 cup and 2 teaspoons)
130 g white granulated sugar (4.6 oz., 2/3 cup)
100 g unsalted butter, diced (3.5 oz., 7 Tablespoons)
75 g shredded mozzarella cheese (2.6 oz., 2/3 cup)
25 g ricotta cheese (or more mozzarella) (0.9 oz., 1 and 2/3 Tablespoons)
200 g kataifi dough (shredded phyllo dough), thawed (7.1 oz.)
20 g honey (0.7 oz., 1 Tablespoon)
Directions
- For the syrup: Place the water in a small saucepan then pour the sugar over it, avoiding the edges of the pan.
- Place over medium heat, stirring occasionally. Once all the sugar has dissolved and the syrup has started boiling, remove from the heat and set aside to cool down. Tip: Reduce the heat if the syrup starts to boil before the sugar has fully dissolved (to prevent crystallization).
- Melt the butter (in the microwave or on the stovetop) and set aside to cool down briefly while you prepare the remaining ingredients.
- In a small bowl, mix together with a spoon the mozzarella cheese and ricotta (if using) until combined.
- Place the kataifi dough in a large bowl. Pull it apart with your hands to separate the strands and cut into smaller pieces.
- Add the honey to the cooled down butter and mix to combine. Gradually drizzle over the kataifi dough, mixing with your hands to coat the dough evenly.
- Divide the kataifi into two portions. Place half on the bottom of a 20 cm/8 inch non-stick frying pan and spread as evenly as possible, covering any gaps with dough (to prevent cheese leaks). Press down gently with your hands then top with the cheese mixture, leaving a small border around the edge (about 1 cm/0.4 inch). Cover with the remaining dough and press down.
- Place over medium heat and keep heating until fragrant and the bottom is golden brown, about 8-9 minutes. The kunefe should easily release when you gently shake the pan and you’ll notice that the bottom edges of the kunefe are starting to brown.
- Off the heat and with oven mitts, carefully place a flat heatproof plate (no rim) over the pan and invert. Then slide the kunefe back into the pan and cook the other side for about 3-4 more minutes or until golden brown. Tip: Use a heatproof spatula to push back the edges into place after flipping if needed.
- Remove from the heat and immediately pour the cooled down syrup all over the kunefe. Be careful as it will bubble up. Let it sit for a few minutes until the syrup is fully absorbed and serve hot. Enjoy!
Notes
- Syrup: The longer you cook the syrup, the thicker it will be. For this recipe, the syrup should be on the thinner side so it is easily absorbed by the pastry. Feel free to make more syrup if you like your desserts very syrupy.
- Cheese: You can increase the amount of cheese if you prefer a thick layer of cheese.
- Kataifi dough: You should ideally thaw it overnight in the fridge. If you forget, you can thaw it at room temperature before starting as explained on the packaging (usually 1-2 hours). It’s best to keep this dough covered so take out only the amount of dough you’ll be working with.
- Baked kunefe: If you’d rather bake the kunefe to avoid having to flip it, bake in the middle of a preheated oven (180°C/356°F) until golden brown, about 35 minutes. Drizzle with syrup. Wait a few minutes before inverting onto a serving plate.
- Cup measurements: Please note that these measurements are approximate. For best results, I’d recommend weighing the ingredients.
- Inspired by Akis Petretzikis’ kunefe.